Post by watchmaker on Sept 25, 2007 18:24:51 GMT -5
COMPASSES
Hi guys,
The impulse to write this post came with the recent discovery that we live in the midst of a generation so dependent on gadgets (and adept at using them) that they lose, or never discover, the simpler way of doing things.
I conducted an “antler hunt” in the April spring woods with a group of Boy Scouts of my son’s troop. The plan was to scout the woods during the day and using flashlights at night, employing compasses to coordinate the excursion.
The group consisted of several boys aged 13 to 16 years, bringing with them a large assortment of electronic equipment. I have to say that they were very excellent at using them, especially the iPods, cell phones, two-way radios, and GPS’s, but they failed miserably in their understanding of the low -tech compass.
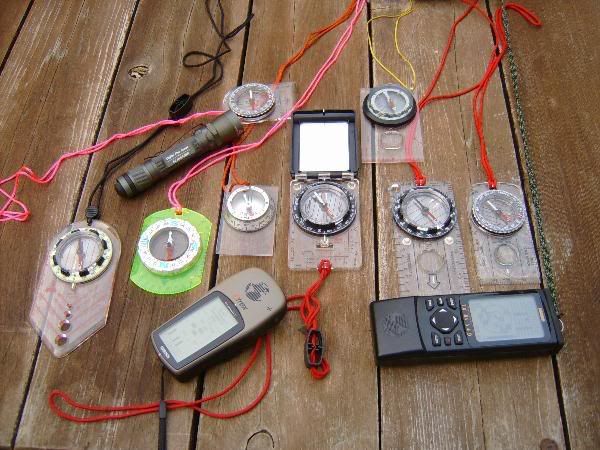
THIS PICTURE SHOWS A VARIETY OF COMPASSES AND TWO GPS’S, THE GARMIN XL12 LT
AND THE GARMIN E-TREX SUMMIT, AS WELL AS A SUREFIRE AVIATOR FLASHLIGHT.
I have nothing against GPS’s; as a matter of fact, I use them myself and have a couple that I use often to complement the compass I use.
After all, the GPS can give you your position (and you can plot this in a map) in any weather and even at night, making it easy to walk cross-country in the woods. However, I am not one of those guys glued to the GPS. After I get my position and course to follow, I put the gadget away and use the compass to get the direction for my trek.
This is going to be sort of a very short (space limitation) refresher course on how to use the basic base plate compass. Of all the types available, I am going to stick to the Silva system for now, as it is the easiest to understand. They come in several flavors; from the inexpensive less- than-$10, to the more elaborate of $50 or so, but they all do the basic job of guiding you well.
That I stick to the Silva system doesn’t mean that you have to buy a Silva Compass. The market is full of others brands that use the same base plate system such as Brunton, Suunto, Kasper & Ritcher, etc.
The mechanics of taking bearings and following directions are very easy. I will try to make them short and understandable, as the scope of this article is only to produce the basics, and should not be considered a treatise in navigation.
The compass’ needle points to the Magnetic North, not the geographic North, but we only have to compensate for it when we use the compass together with a map.
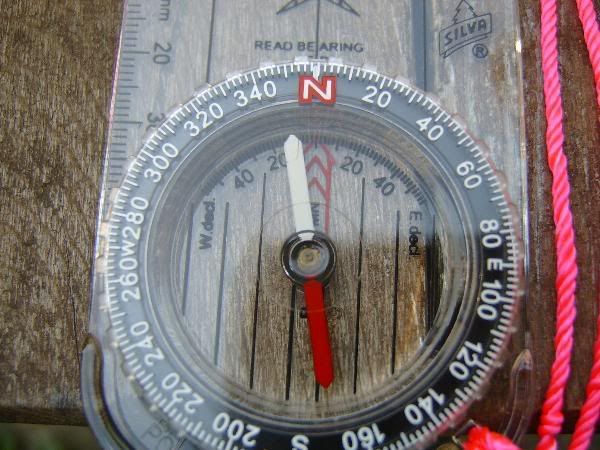
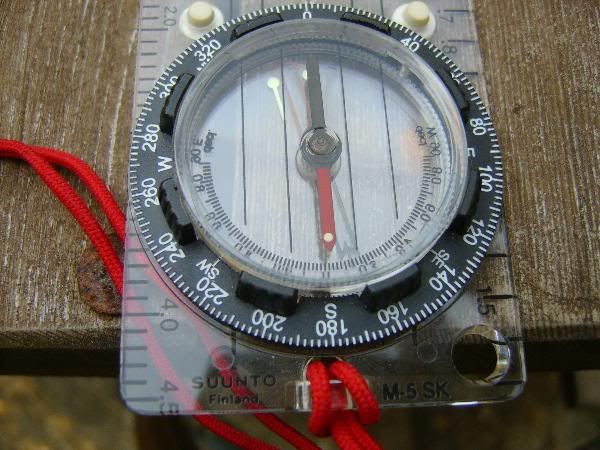
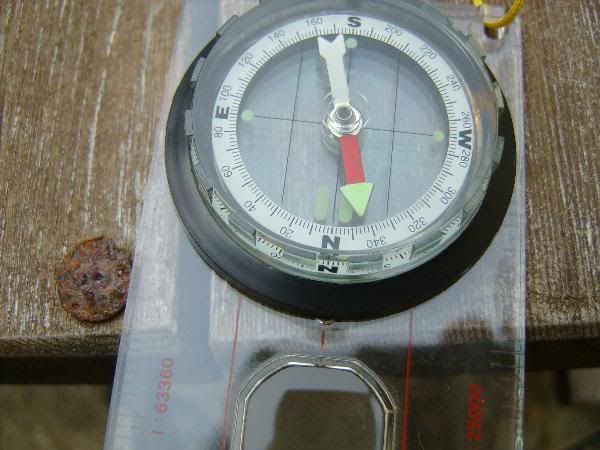
For navigation in the woods without a map, this is what you have to do. With the compass in front of you, point the direction-of-travel arrow in the direction you want to go, then rotate the capsule until the magnetic arrow North part (usually red) lies pointing to the letter N (for North) in the capsule. Read the bearing (in degrees) at the junction of the line-of-travel arrow and the capsule. In this case, it is showing 270 degrees, which means that the direction you want to travel in is 270 degrees, or exactly West.
Now, move your feet and rotate your body (not the compass) until the magnetic needle points to the N. Pick a landmark lying in your direction (West) and walk to it without looking at the compass. When you reach that landmark, reorient your body again, pick another landmark (a tall tree?) and keep walking until you get to your destination.
When you want to return, don’t change anything on the compass! Move your body, putting the South part of the needle over the “N,” or alternatively, just invert the base plate with the direction-of-travel arrow pointing towards you. Or, if you want to change the setting, just put East as your returning direction in the line-of-travel; that will be 90 degrees in your numbered capsule.
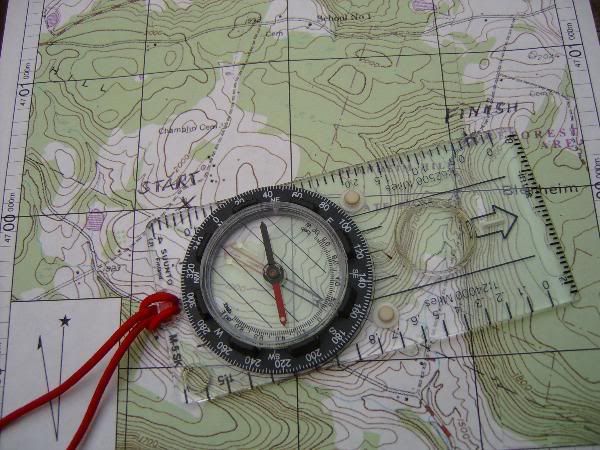
And to make this explanation as simple as possible, I will explain compass and map together in the next posting.
Best wishes
Watchmaker
Hi guys,
The impulse to write this post came with the recent discovery that we live in the midst of a generation so dependent on gadgets (and adept at using them) that they lose, or never discover, the simpler way of doing things.
I conducted an “antler hunt” in the April spring woods with a group of Boy Scouts of my son’s troop. The plan was to scout the woods during the day and using flashlights at night, employing compasses to coordinate the excursion.
The group consisted of several boys aged 13 to 16 years, bringing with them a large assortment of electronic equipment. I have to say that they were very excellent at using them, especially the iPods, cell phones, two-way radios, and GPS’s, but they failed miserably in their understanding of the low -tech compass.
THIS PICTURE SHOWS A VARIETY OF COMPASSES AND TWO GPS’S, THE GARMIN XL12 LT
AND THE GARMIN E-TREX SUMMIT, AS WELL AS A SUREFIRE AVIATOR FLASHLIGHT.

I have nothing against GPS’s; as a matter of fact, I use them myself and have a couple that I use often to complement the compass I use.
After all, the GPS can give you your position (and you can plot this in a map) in any weather and even at night, making it easy to walk cross-country in the woods. However, I am not one of those guys glued to the GPS. After I get my position and course to follow, I put the gadget away and use the compass to get the direction for my trek.
This is going to be sort of a very short (space limitation) refresher course on how to use the basic base plate compass. Of all the types available, I am going to stick to the Silva system for now, as it is the easiest to understand. They come in several flavors; from the inexpensive less- than-$10, to the more elaborate of $50 or so, but they all do the basic job of guiding you well.
That I stick to the Silva system doesn’t mean that you have to buy a Silva Compass. The market is full of others brands that use the same base plate system such as Brunton, Suunto, Kasper & Ritcher, etc.
The mechanics of taking bearings and following directions are very easy. I will try to make them short and understandable, as the scope of this article is only to produce the basics, and should not be considered a treatise in navigation.
The compass’ needle points to the Magnetic North, not the geographic North, but we only have to compensate for it when we use the compass together with a map.
For navigation in the woods without a map, this is what you have to do. With the compass in front of you, point the direction-of-travel arrow in the direction you want to go, then rotate the capsule until the magnetic arrow North part (usually red) lies pointing to the letter N (for North) in the capsule. Read the bearing (in degrees) at the junction of the line-of-travel arrow and the capsule. In this case, it is showing 270 degrees, which means that the direction you want to travel in is 270 degrees, or exactly West.
Now, move your feet and rotate your body (not the compass) until the magnetic needle points to the N. Pick a landmark lying in your direction (West) and walk to it without looking at the compass. When you reach that landmark, reorient your body again, pick another landmark (a tall tree?) and keep walking until you get to your destination.
When you want to return, don’t change anything on the compass! Move your body, putting the South part of the needle over the “N,” or alternatively, just invert the base plate with the direction-of-travel arrow pointing towards you. Or, if you want to change the setting, just put East as your returning direction in the line-of-travel; that will be 90 degrees in your numbered capsule.
And to make this explanation as simple as possible, I will explain compass and map together in the next posting.
Best wishes
Watchmaker

